| Major
Modifications |
| Anatomy
of a Safari Roof
Use the navigation bar below to select the section you'd like
to see.
|
Next was the awful job of cleaning away all the moss, mould and
general detritus that had accumulated between the roofs over the
years. A bucket of hot soapy (Fairy liquid) water and a
scrubbing brush soon cut through it and it cleaned up remarkably
well. I taped over the rivet holes from inside, and bogged them
from the top, eventually sanding and painting these.
|
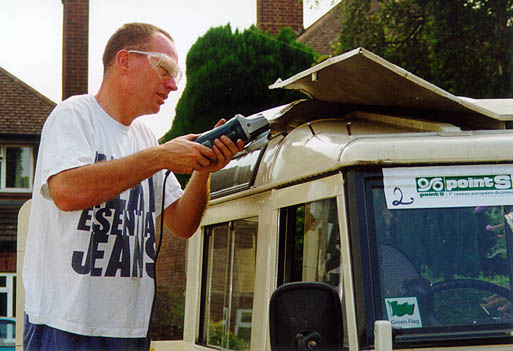
I quickly decided that an
angle grinder was going to be the only way that this thing was
coming off, It was clear by the state of the bolt heads on both
sides that no amount of WD-40 and a screwdriver of any size would
make a difference.
Once the ten bolts, five per side were gone, it was a case of
drilling out the million and one rivets holding the centre section
on. That accomplished, the roof lifted off cleanly enough. |
|
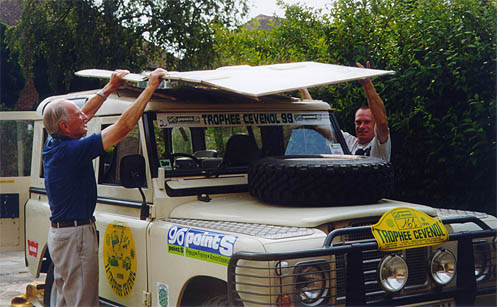
Dad gives me a hand lifting the safari roof off the Landie. Dad
also had the awful job of removing the huge gobs of silicon sealer
I had used to attach the coving to the roof and safari roof at the
front. Well done, dad!
|
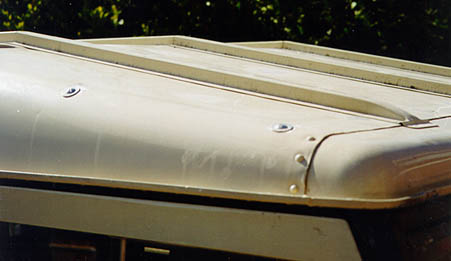
The larger ten bolts
around the edges had left enormous 1 inch holes along the roof,
which I was reluctant to bog. Instead, I simply covered them using
large, but short, gutter bolts with huge washers either side and
copious amounts of silicon sealer to keep it watertight.
After a quick clean up and a splash of paint over the bolts, you'd
never know it wasn't the way the Landie left the factory.
|
|
|
The finished product. The two bolt holes shown are covered and
watertight. Painting has left them looking like they were factory
fitted! |
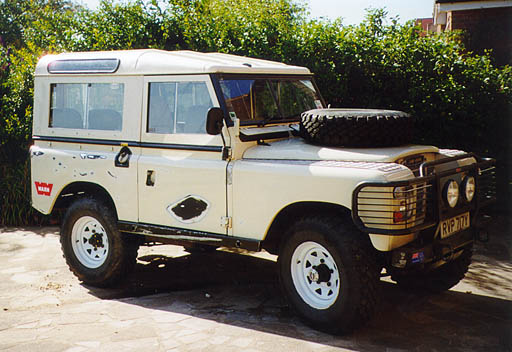 |
Having removed the Trophee Cevenol stickers, the landie looks
bare. The stickers took some of the paint away with them too! The
paint scratches on the rear panel are from when we had the landie
tipped over on its side, not something I'm rushing to repeat... |
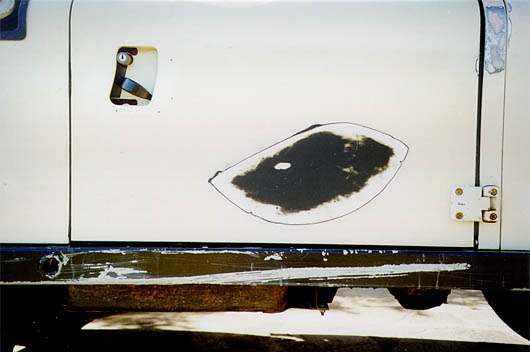 |
Note the huge scrape along the Sill Protector bar. That rock would
have trashed the standard sills and had a go at the petrol tank as
well I suspect. |
So
What's Next?
I've replaced the shocks and springs since the Trophee
Cevenol due to the complete hammering they got in France. The
springs I've fitted are parabolics (pair-a-bollocks?) which has
raised the vehicle by about three inches and vastly improved axle
articulation. I hope to have some pics of those up in the next
couple of days. I'm about to add a new steering damper, and the
exhaust manifold gasket has just blown, so that's scheduled for
the weekend!
Use the navigation bar below to select the section you'd like to
see.
|