The Biposto to Mono
Conversion
Ducati 996 Biposto
Masquerades as an SPS!
Click the thumbnails below to view an enlargement (600x450 pix)
|
The Biposto to Mono
Conversion Click the thumbnails below to view an enlargement (600x450 pix) |
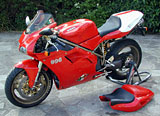 |
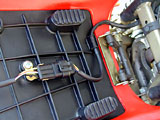
The whole idea is to duplicate
enough of the parts required, so that you can swap from bip to mono and back
again in just a few minutes. The thing to avoid is having to unbolt parts from one seat to put on the other - they're cheap enough, so simply have all the appropriate brackets on both. Here is the bike in the mono configuration. Re attach the foot pegs, swap seats, and in 3 minutes 20 seconds, it's a Biposto again. Marvellous! |
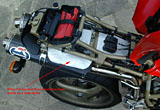 |
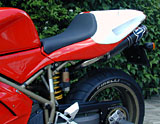
One nice thing about going from
bip to mono is that you don't need a new sub frame. If you've got an SPS and
want to go from mono to bip on the other hand, you'll need to add a new sub
frame to cope with the extra weight of a passenger, and you'll need rear
foot pegs too! Also shown in this photo is some 2mm silver foil backed insulation foam which I've stuck on with double sided carpet tape to act as a heat shield. It works amazingly well and now keeps my bum and legs significantly cooler now that summer is here. |
 |
With the SPS tail unit, there's a
lot more room under the seat for all sorts of goodies. Just remember to secure anything you put in there because there's no passenger seat to keep it all snug - as I found out; one lost mobile phone later... Ho hum. |
 |
Bits you'll need to do the
conversion: Part Number Description 438.2.019.2NA Rear fairing (Red) (438.2.019.2NB for Yellow) 827.1.086.1A Seat bracket 777.5.234.2B Screws for bracket above (x2) 595.1.027.1A Seat Assembly (includes rubber pads x4) 866.1.023.1A Right hand pad 866.1.024.1A Left hand pad 827.1.120.1A Plate 829.2.004.1A Holder 713.1.109.1A Spacers x2 (which I think is 4mm too long - but check it first) 779.5.009.1A Screws for spacer above x2 525.4.005.3A Tail lamp assembly (includes bulbs) 827.1.111.1A Plate for cable connector 866.1.018.1A Rubber spacer 866.1.020.1A Rubber Stoppers x2 764.1.024.1A Rubber Grommets x2 832.1.008.1A Pins x2 Have your local dealer check these part numbers - I'm fairly sure they're correct, but I'm in the UK, your part numbers may differ. You'll also need 4 nuts, (5mm hole, which use an 8mm socket), and four washers. These attach the seat to the fairing. Total cost here in the UK: Ł528.64 using all new parts. Oh, and is just me, or do Ducati part numbers look like IP addresses on steroids? |
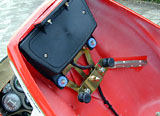 |
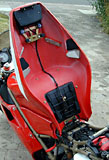
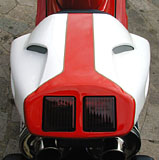
Here's how the brake/tail light assembly all hooks together on the SPS tail unit. |
 |
Adjusting the position of the
bracket with the two black stoppers on it allows you to adjust the distance
between the front of the seat and the fuel tank. The pins which the blue
grommets fit over can either be screwed into place before you've got the
black plastic brake light assembly attached, or afterwards. If you do it
before, then quite a bit of force is required to compress the little rubber
spacer between the tip of the tail unit and the lights (not shown) so that
the grommets fit over the locating pins. |
 |
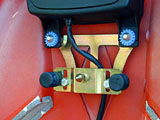
The spacer shown here was supplied
with the bracket, but left the tail unit very high, and quite odd looking. I
whipped 4mm off each spacer with a hacksaw and refitted to get the result
you see in the finished shots below. The bolt shown (x2) loosens to allow the bracket position to be adjusted, which in turn allows for the seat backwards/forwards position to be set. |
 |
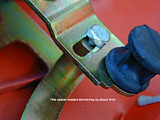
Don't forget to get this little bracket which holds the brake light cable connector (in the parts list above). |
 |
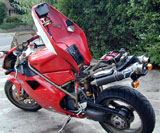
All done, as viewed from behind... |
 |
...and from the side. Don't
forget to remove the passengers foot pegs or the entire effect will be lost! |
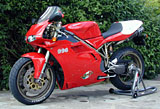 |
Job done. Total time taken: 45mins. Apart from the Showa forks and rear shock, you'd never know! Click here to have a look at some General
Photos of my 996. Back to the TOP |
|
|
|