|
Getting Under the Covers |
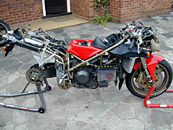 |
Having removed the fairing panels,
the fuel tank, seat tail unit, front fairing and the rear wheel, the techy
detail of the 996 is laid bare for closer inspection. Having both front and
rear paddock stands is a real bonus, and makes working on the bike much
easier. <-- Click for an enlargement. |
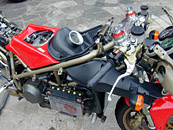 |
General shot of the under tank
area. The induction roar of the twin barrels is quite something! |
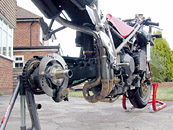 |
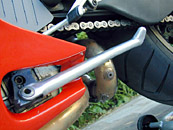
The rear axle spindle - recently
the cause of a safety recall due to the possibility of cracks appearing in
the hollow shaft which the wheel bolts on to. More detail on this can be
found at:
www.ducatisportingclub.com/index.php3?M=15 |
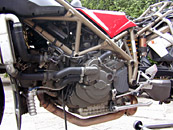 |
The engine spaces from the left
hand side. Sure is a lot of plumbing in there! |
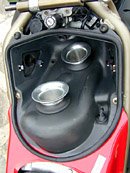 |
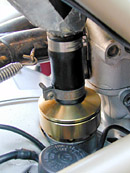
The airbox. The rubber seal around
the top mates with the bottom of the fuel tank to provide it's seal. The
left air intake can be seen as the triangular entry port on the left wall of
the airbox. |
|
Fun with Lockwire |
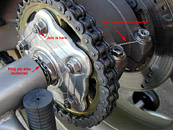 |
I don't race my 996, but it seemed
a shame to let all those lockwire friendly bolts go to waste, and besides
which - it looks very professional when done well. Here we see the rear
sprocket, axle pinch bolts and the retaining pin have all been lock wired.
Click the thumbnail for an enlargement. |
 |
Getting the lockwire to loop
around theses bolts and then join seamlessly is quite tricky.
Start with a loop of lockwire, and twist around a single bolt head, twist it
up to the distance to the next bolt head, then pass one wire over the top,
and one under the bottom of the bolt head and twist them up together on the
other side.
Keep repeating this until you've gone all the way around all five bolts and
are back to the beginning.
At this point you need to follow the same procedure, but behind the
beginning loop, twist it up, chop it off and wrap it around neatly, as shown
in the picture.
Don't be disappointed if it looks awful the first time around - it took me
at least six or seven attempts to get it right! |
 |
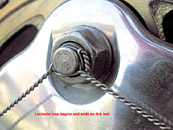
This is the wheel locknut
retaining pin on the right side of the swing arm - it also gets the lockwire
treatment. |
|
Cockpit Modifications |
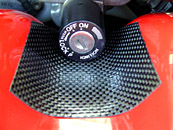 |
The previous owner of this bike
had a key ring which had scratched the tank, and also the ignition key
barrel itself had done some damage.
The fix was simple enough, I bought a sheet of sticky backed Kevlar weave
(used in carbon fibre production) and cut a small piece to shape and fitted
it to the tank under the ignition barrel.
No more damage and the unsightly scratches are covered. Because it's carbon
fibre looking, it fits with the rest of the bike and doesn't look out of
place. Job done! |
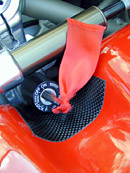 |
What to put on the ignition key in
the way of a key fob had me scratching my head for a bit, until I found an
old piece of red silk. Cut a small slit in it and loop it through the key
and you've got a stylish key ring which won't damage the surrounding area
when it flaps about at speed. |
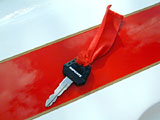 |
The ignition key with the red silk
key fob sitting on the SPS tail unit. |
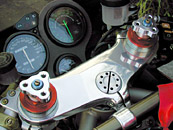 |
The obvious mod here are the
polished pre-load adjusters (the big triangular pieces on the fork tops).
What may not be so obvious is the polished top fork yoke. It really sets the
cockpit area off nicely. |
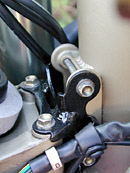 |
Down in front of the instrument
cluster under the top fork yoke pictured above, is this small bracket. Mine
was in pretty bad shape (corrosion wise) so I removed it, cleaned it up and
painted it gloss black with a corrosion preventative paint. It looks much
better now. |
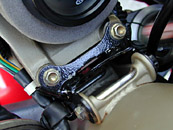 |
The same bracket discussed above,
but viewed from above, as you would see it when riding. |
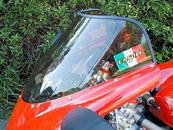 |
This double-bubble tinted screen
makes high speed riding much easier by providing a bigger area to hide
behind, it means you don't need to tuck-up quite as tightly when really
screaming along at the legal limit of 70mph - which of course I never
exceed. Well, not much anyway. |
|
Other Bits & Pieces |
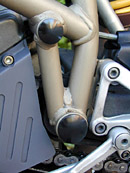 |
These anodised aluminium frame
plugs don't add anything to the bike except weight. Arguably they keep dust
and water away from the frame nuts and bolts where the engine and swing arm
attach. But to be really honest - I think they just provide a nice finish. |
 |
The anodised oil breather thingy
(sorry, I can't find a description for this in the parts guide!) adds
another nice finishing touch and absolutely not one ounce of improved
performance.
But who cares? |
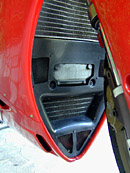 |
This carbon fibre front screen has
greater ventilation than the standard unit and improves oil cooling. Note
the wire mesh screen covering all of the openings near the bottom which
provides protection to the oil cooler from small stones etc. |
 |
Not exactly obvious in this shot,
is the polished stainless steel side stand. |
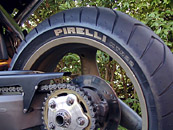 |
Another Ducati owner mentioned
what a difference tyre marking the manufacturers name with a white tyre
marking pen makes, I have to agree, it adds a very nice finishing touch.
All I've got to do now is learn to ride properly so I can get the tyre worn
down to the edges! |
 |
Polished end cans (45mm race spec)
and a suitably annotated number plate, just in case anyone following hadn't
caught on by now, that is is a Ducati. And a bloody loud one, too! |
|
The Biposto to Mono
Conversion
more here |
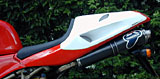 |
I liked the idea of being able to
un-clip the rear seat unit and swap it for a mono seat for when I go riding
by myself (which happens a lot these days). I didn't want the drama of
having to undo all the nuts and bolts from one seat and transfer them to the
other seat each time I did this - so I bought everything required to make
each seat unit self sufficient, and then spent 45 minutes assembling it all. |
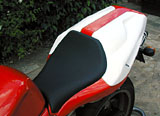 |
The finished product looks really
good - if you're interested in doing this yourself, check out my
Biposto to Mono Conversion page with a
complete parts list and pictures of what to do and what to look out for. |
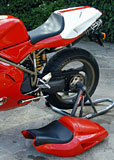 |
All done with both seats complete.
That change over takes just a few minutes, including attaching or removing
the passenger footpegs. |
|
The Arty Farty bit |
 |
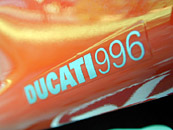
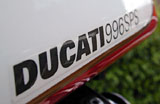
I don't think these pics need much
in the way of description... |
 |
Except perhaps this one. Some of
the goodies I've got on my bike were put there by the previous owner and
were supplied by Casoli Moto, who are just down the road from me here in
London (which makes them frighteningly convenient!).
I don't work for, nor am I affiliated with Casoli Moto in any way, other
than being a satisfied customer.
So there! |
 |
The little sticker on the tail
unit. Pretty good camera, eh? It's a Nikon Coolpix 950 in case you're
wondering. |
 |
With the mono "SPS" tail unit
attached, you get the SPS badge without having to spend all that cash on
titanium conrods, Ohlins forks and the like! Click here to look at the
Bip to Mono Conversion Process in more
detail...
Or click here to have a look at some General
Photos of my 996.
Back to the TOP |

click on the wombat to return home... |
